
Recently I started testing the Arduino microcontroller platform. I ordered some Arduino Nano clones for about 7,- EUR. They work great – USB connectivity is onboard, so there is no need for programmers like with the PIC controllers; you can directly upload sketches from your PC to the Arduino. The Arduino IDE (Integrated Development Environment) is available for free (arduino.cc), so it is really easy to get your first programs running. It soon turned out that this platform is a great starting point for developing MIDI applications/hardware. Especially for DIY!
My first MIDI devices were based on the PIC microcontroller. I started programming the PICs with assembler, which is quite abstract and not really effective, especially if you’re not a pro… At least the PIC-based Mitch (MIDI Switch) is outdated (hard- and software). Time to move on – here comes the Arduino MIDI Switch!
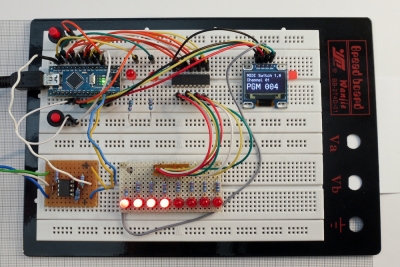
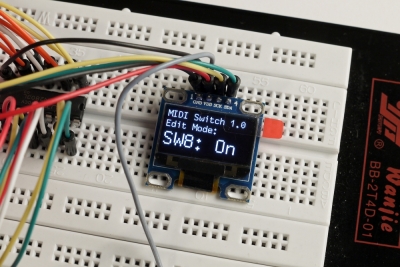

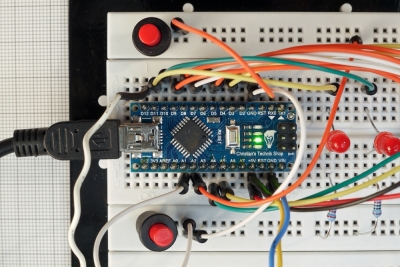
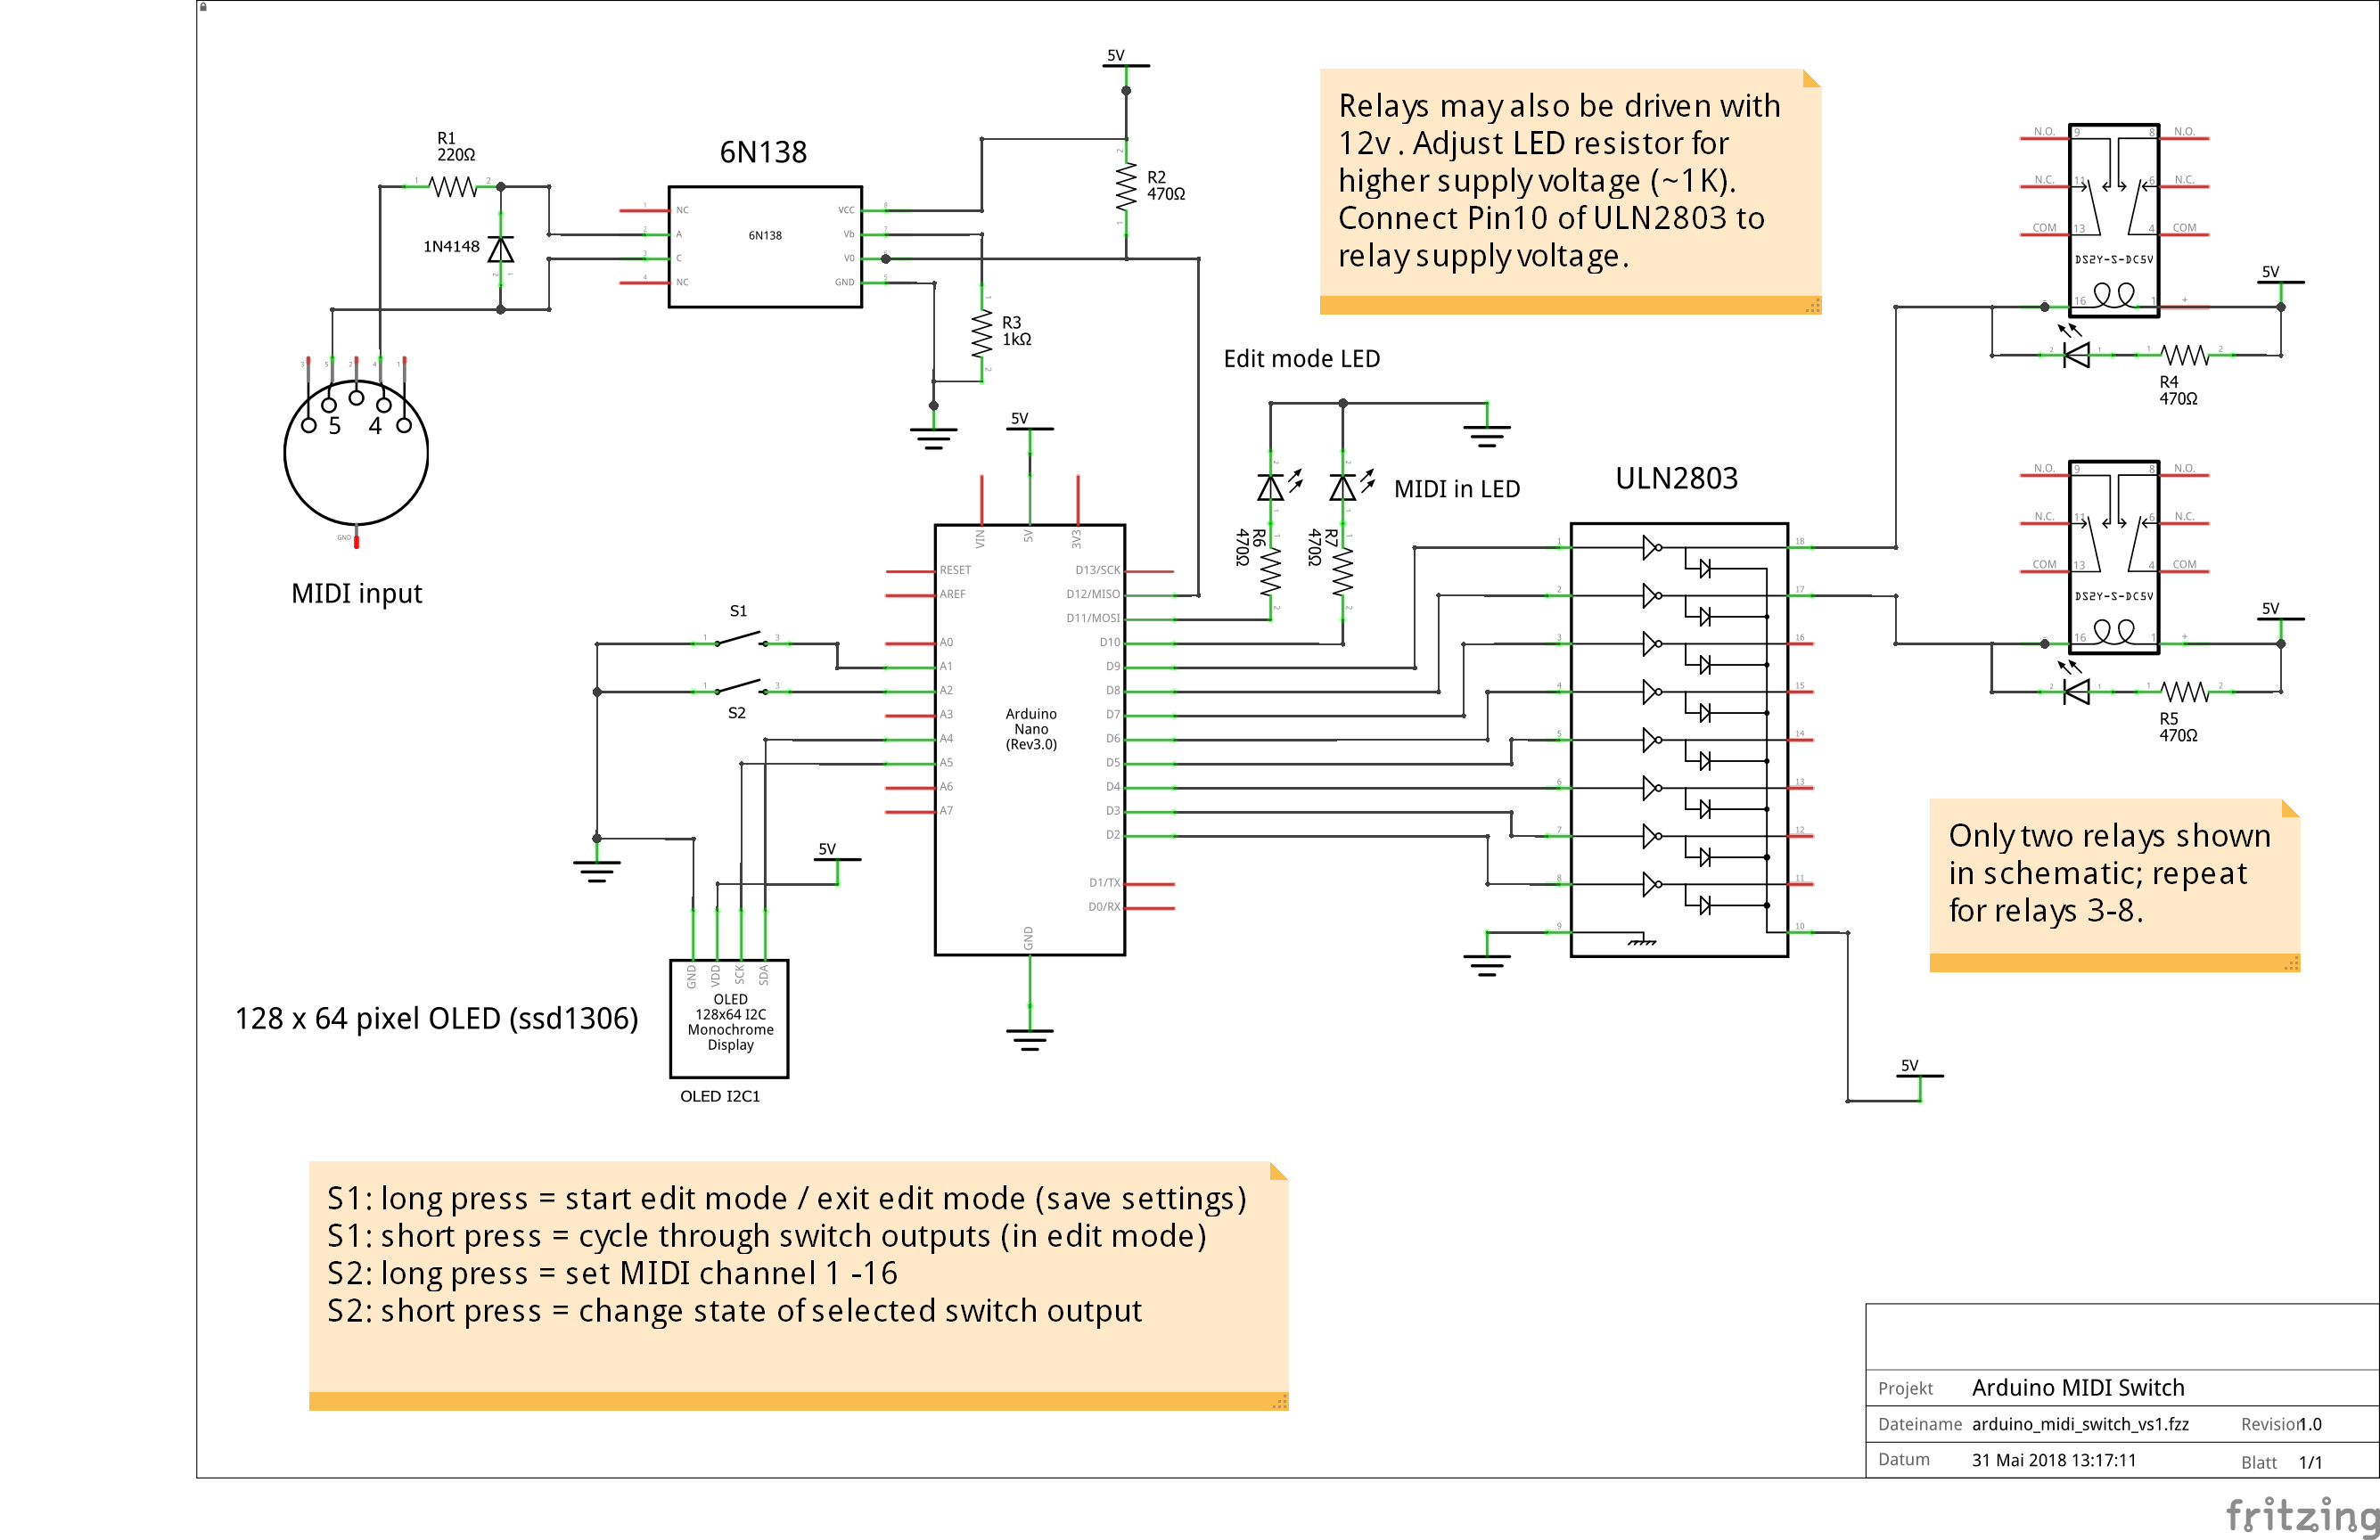
The Arduino MIDI switch for guitar amp/effect switching is my first complete Arduino project. It receives MIDI program change messages from any MIDI pedal/device and can store switch settings for eight outputs with each program. You can set the MIDI receive channel (1-16); this setting will be saved, so it is persistent when switching on/off the device. The switch can be operated from only two push buttons. These buttons have different functions depending on a long/short press. There is a small 128×64 OLED display showing all relevant info, like current MIDI program number, MIDI channel, operating mode, etc.
Software for the Arduino platform is written in C++, which is a high-level language, so reading and writing code is more intuitive (there are also tools to program PICs in high-level languages – but that’s a different topic). Many Arduino projects deal with input/output processing (sensors, interfaces, displays, switches), there are many libraries with useful functions already available. The Arduino IDE comes with (basic) examples.
My software makes use of several Arduino libraries; if you decide to program your Arduino with this software, you have to download/install those libraries first, otherwise you will not be able to compile and upload my code:
- Software serial library (included in Arduino IDE by default)
- Text only Arduino library for SSD1306 OLED displays (https://github.com/greiman/SSD1306Ascii)
- Arduino OneButton library (https://github.com/mathertel/OneButton)
How to use the MIDI switch:
- Connect a MIDI device (any device sending MIDI program changes)
- Set the MIDI channel: Button 2 *long press* (repeated *long press* increases channel)
- Send program change on correct channel; MIDI in LED lights up shortly, display shows current program number
- Set outputs for current MIDI program number: Button 1 *long press* starts edit mode (edit mode LED lights up, display shows message)
- Select outputs: Button 1 *short press* cycles through switch index (1-8, shown on display)
- Toggle outputs (on/off): Button 2 *short press* changes output state of selected output (on/off shown on display)
- Exit edit mode/save settings: Button 1 *long press* (edit mode LED turns off)
Download for the source of the current software version (with CC function) is available here: MIDI_Switch_v12_2020-10
Download for the source of the older version (without CC function) is available here: MIDI_Switch_v10_2020-04
(Note: The version without CC function will not receive any further updates)